

Blog
Polaris 1000 Rebuild Kit: Complete Engine Overhaul Guide

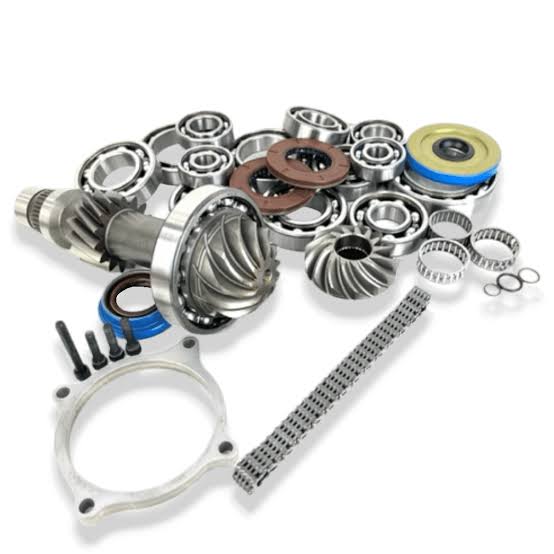
Every high-performance off-road powertrain operating under extreme thermal load and high-RPM conditions eventually hits a tipping point where mechanical wear degrades performance. When dust ingestion scours cylinder walls or oil starvation scores main crank journals, installing a complete Polaris 1000 rebuild kit restores factory compression, eliminates oil consumption, and brings factory horsepower back to life.
This guide breaks down every critical phase of overhauling your ProStar 1000 engine. From evaluating component quality in aftermarket packages to executing exact main bearing clearances and cylinder hone finishes, doing the job right protects your investment and ensures trail reliability.
Understanding the Polaris ProStar 1000 Engine Architecture
The Polaris ProStar 1000 platform is a 999cc dual-overhead-camshaft (DOHC) parallel-twin engine utilizing four valves per cylinder. Designed specifically for side-by-side applications like the RZR XP 1000, General 1000, and Ranger XP 1000, this platform delivers between 100 and 114 horsepower in naturally aspirated trim.
+--------------------------------------------------------------------+
|                    POLARIS PROSTAR 1000 ARCHITECTURE                |
+--------------------------------------------------------------------+
| Compression Ratio : 10.5:1 (Naturally Aspirated) / 9.0:1 (Turbo)  |
| Valve Train       : Dual Overhead Cam (DOHC), Shim-Under-Bucket    |
| Cylinder Bore     : 93.00 mm (Standard OEM)                        |
| Engine Stroke     : 73.50 mm                                       |
| Oil System        : Wet Sump with High-Flow Internal Rotor Pump    |
+--------------------------------------------------------------------+
Because the engine relies on high peak operating RPM (often running between 7,000 and 8,500 RPM under load), component tolerances are tight. Main crank journals use color-coded shell bearings matched to micro-measured crank pins and crankcase bore codes. Deviating from these exact clearances during a rebuild causes rapid oil pressure drops and premature journal scoring.
Component Checklist for a Polaris 1000 Rebuild Kit
A complete engine rebuild kit must contain every consumable part, seal, and structural component needed to overhaul both the top-end and bottom-end assemblies simultaneously. Standard kits vary in quality, so auditing the package before assembly prevents costly project delays.
                  +-----------------------------------+
                  |  POLARIS 1000 REBUILD KIT CONTENT |
                  +-----------------------------------+
                                    |
          +-------------------------+-------------------------+
          |                                                   |
[ TOP-END COMPONENTS ]                              [ BOTTOM-END COMPONENTS ]
  * Forged/Cast Pistons (93mm+)                       * Heavy-Duty Crankshaft Assembly
  * Rings, Wrist Pins, & Circlips                     * Main & Connecting Rod Bearings
  * Cylinder Block (Replated/Sleeved)                 * Counterbalance Shaft Bearings
  * MLS Head & Base Gaskets                           * Complete Crankcase Oil Seals
  * Valve Stem Seals & O-Rings                        * Water Pump & Stator Cover Seals
1. Top-End Components
- Cylinder Block: High-pressure die-cast aluminum block featuring Nickel Silicon Carbide (Nikasil) plating.
- Pistons: Cast aluminum or forged 2618 alloy pistons. Forged options handle higher combustion temperatures and knock resistance under severe loads.
- Piston Rings: Nitrided top rings, ductile iron second rings, and three-piece oil control ring assemblies.
- Gasket Set: Multi-Layer Steel (MLS) head gasket, base gasket, exhaust manifold gaskets, and high-temp valve stem seals.
2. Bottom-End Components
- Crankshaft Assembly: Forged steel crank with pre-installed connecting rods and wrist pin bushings.
- Bearings: Tri-metal main and rod bearing inserts matched to journal color bands.
- Gaskets & Seals: Complete crankcase perimeter gaskets, outer clutch cover seals, PTO and MAG oil seals, and water pump mechanical seals.
Top-End vs. Full Bottom-End Rebuild Specifications
Choosing between a simple top-end refresh and a total engine overhaul depends on crankcase oil contamination, journal wear, and connecting rod play.
| Parameter | Top-End Refresh Only | Complete Engine Rebuild |
| Primary Scope | Pistons, Rings, Cylinder, Valve Seals | Crankshaft, Rods, Mains, Cylinder, Pistons |
| Typical Downtime | 4 to 8 Hours | 12 to 20 Hours |
| Average Kit Cost | $350 – $650 | $1,200 – $2,200 |
| Crankcase Splitting | Not Required | Required (Full Case Halves Separated) |
| Recommended When | Compression loss from dust, good lower oil | Metal shavings in oil, rod knock, high hours |
Step-by-Step Installation Guide for a Polaris 1000 Rebuild Kit
Executing a clean, precise engine build requires dedicated workspace preparation, clean shop rags, calibrated torque wrenches, and plastigauge measuring strips.
[ Step 1: Disassembly & Clean ] ---> [ Step 2: Measure Clearances ] ---> [ Step 3: Crank Case Prep ]
                                                                                   |
[ Step 6: Thermal Break-In ]   <--- [ Step 5: Valve Train Timing ]   <--- [ Step 4: Cylinder Install ]
Step 1: Tear-Down and Case Cleaning
- Pull the engine from the chassis using an engine hoist or cherry picker. Mount the engine securely to a work stand.
- Remove the valve cover, camshafts, cylinder head, and cylinder block.
- Split the crankcase halves and drain all residual oil.
- Clean crankcase mating surfaces using solvent and a plastic scraper. Avoid brass or steel wire wheels that gouge aluminum surfaces.
Step 2: Checking Clearance and Torque Specs
Before installing the new crankshaft from your Polaris 1000 rebuild kit, verify main and rod bearing oil clearances using Plastigauge.
+--------------------------------------------------------------------+
|                    CRITICAL TORQUE SPECIFICATIONS                  |
+--------------------------------------------------------------------+
| Crankcase Case Bolts (8mm)      : 22 ft-lbs (30 Nm)                |
| Crankcase Case Bolts (10mm)     : 44 ft-lbs (60 Nm) in sequence    |
| Connecting Rod Bolts            : 33 ft-lbs (45 Nm) + 45° Angle     |
| Cylinder Head Bolts (M11)       : Step 1: 30 ft-lbs, Step 2: 60°   |
| Camshaft Cap Bolts              : 89 in-lbs (10 Nm)                |
+--------------------------------------------------------------------+
- Main Bearing Oil Clearance: Target 0.0012 to 0.0018 inches.
- Connecting Rod Bearing Clearance: Target 0.0014 to 0.0020 inches.
- Piston Ring End Gap: Set top ring gap to 0.012–0.014 inches; set second ring gap to 0.016–0.018 inches.
Step 3: Assembling Lower Crankcase
- Apply high-tack assembly lube to main and rod journal bearing shells.
- Set the crankshaft into the upper case half, aligning timing marks on the oil pump drive gear and counterbalance shaft.
- Apply a thin bead of ThreeBond 1211 or equivalent anaerobic sealant to the crankcase mating flange.
- Join case halves, hand-thread all fasteners, and torque in a cross-pattern sequence to factory settings.
Step 4: Top-End Assembly
- Stagger piston ring gaps 120 degrees apart. Avoid aligning gaps over wrist pin bores.
- Compress rings with an adjustable ring compressor tool and slide the cylinder block over the pistons.
- Place a new MLS head gasket over locating dowels.
- Set the cylinder head, apply engine oil to main head bolt threads and washers, and torque in sequence.
Step 5: Setting Valve Train & Camshaft Timing
- Rotate crankshaft to Top Dead Center (TDC) on cylinder one. Verify flywheel TDC timing marks align with the crankcase window.
- Install intake and exhaust camshafts with lobe peaks facing outward from each other at TDC.
- Torque camshaft retainer caps evenly to prevent binding. Check shim clearance with feeler gauges.
- Intake Clearance: 0.006 in ± 0.001 in (0.15 mm ± 0.02 mm)
- Exhaust Clearance: 0.008 in ± 0.001 in (0.20 mm ± 0.02 mm)
Break-In Procedure for Maximum Engine Lifespan
Proper break-in seating establishes correct ring tension against the cylinder wall. Skipping this procedure results in glazed cylinders and persistent oil burning.
+--------------------------------------------------------------------+
|                  BREAK-IN ENGINE RUNNING PROTOCOL                  |
+--------------------------------------------------------------------+
|  0–30 Minutes  | High-zinc 10W-40 mineral break-in oil. Moderate  |
|                | RPM (3,000–4,500). Vary throttle continuously.     |
+----------------+---------------------------------------------------+
| 30–120 Minutes | Full heat-cycle cool down. Drain initial oil.     |
|                | Replace oil filter. Refill with break-in oil.     |
+----------------+---------------------------------------------------+
|  2–10 Hours    | Resume light trail riding. Short full-throttle    |
|                | bursts under load to load piston rings.           |
+----------------+---------------------------------------------------+
|   10 Hours     | Complete final break-in oil service. Change to    |
|                | full-synthetic 5W-50 off-road engine oil.         |
+----------------+---------------------------------------------------+
Frequently Asked Questions (PAA Sourced)
How much does it cost to rebuild a Polaris 1000 engine?
Rebuilding a Polaris 1000 engine typically costs between $1,200 and $2,200 if you buy a complete Polaris 1000 rebuild kit and do the work yourself. Paying a professional powersports technician increases the total cost to between $3,500 and $5,000 due to labor-intensive tear-down and shop machining time.
How long does a Polaris 1000 engine last?
A Polaris ProStar 1000 engine generally lasts between 5,000 and 10,000 miles (or 250 to 500 operating hours) under normal maintenance.Severe environments like deep water, sand dunes, or neglected air filter servicing cut service life down significantly. Regular synthetic oil changes double expected engine service life.
How long does it take to rebuild a Polaris 1000 engine?
An experienced technician takes about 8 to 12 hours to complete a full engine rebuild. DIY mechanics should plan for 15 to 20 hours spread across a weekend. This timeframe includes engine removal, case splitting, clearance measurement, final assembly, and initial break-in procedures.
What causes a Polaris 1000 engine to blow up?
The most common causes of Polaris 1000 engine failure are dust ingestion through degraded air filter intake boots, oil starvation from stuck pressure relief valves, and overheating. Dust rapidly wears piston rings, while low oil pressure spins connecting rod bearings, causing catastrophic internal engine damage.
Can you bore out a Polaris 1000 cylinder?
Yes, standard aluminum Polaris 1000 cylinders can be bored out, but they require resleeving or re-plating with Nickel Silicon Carbide (Nikasil). Boring without re-plating exposes bare soft aluminum, destroying the cylinder within minutes of starting. Overbore pistons up to +2mm are available in custom rebuild kits.
What oil should I use after rebuilding a Polaris 1000?
Use a high-zinc non-synthetic mineral break-in oil for the first 10 operating hours to allow piston rings to seat cleanly against cylinder walls. After initial break-in, switch to full-synthetic 5W-50 or 10W-50 motor oil engineered for extreme thermal protection in high-RPM off-road environments.
Installing a quality Polaris 1000 rebuild kit gives your side-by-side a fresh lease on life, maintaining power output and off-road dependability for years. Order your complete overhaul components today to get your machine back out on the trail.
