

Blog
RZR & Ranger 800 Piston Kit Guide: Specs, Bore Sizes, and What to Buy Before You Rebuild

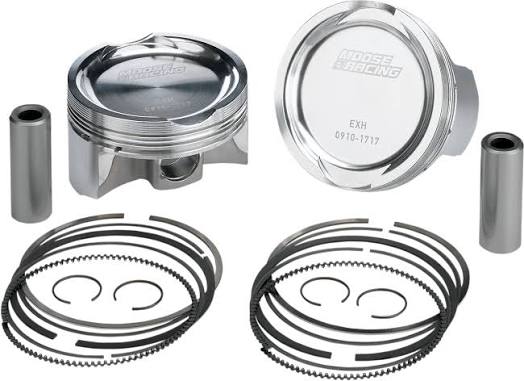
If your Polaris RZR 800 or Ranger 800 has lost compression, started smoking, or has you staring at a parts catalog full of confusingly similar options, the 800 piston kit you choose determines almost everything about how that rebuild turns out — the power you get back, the reliability you can expect, and whether you’re doing this job once or twice. This engine is shared across a wider family of Polaris machines than most owners realize, which is exactly why piston kit listings get confusing fast: standard bore or big bore, cast or forged, 80mm or 82mm, RZR-specific or universal fitment across Ranger and Sportsman too. Getting this decision right the first time saves real money and real weekend hours — this guide exists to make sure you do.
This guide breaks down the real specifications behind this engine platform, what a piston kit actually needs to include for a proper rebuild, how to decide between standard bore and big bore, the symptoms that tell you it’s time for a top-end job in the first place, and a complete installation overview. We’ll also cover the fitment overlap across RZR, Ranger, and Sportsman 800 models, since understanding that shared platform is the key to buying the right kit the first time — not the second. Along the way, we’ll walk through real diagnostic scenarios, the tools you’ll actually need on the bench, how a piston kit interacts with the rest of the drivetrain, and the cost trade-offs between a DIY rebuild, a professional shop job, and a full engine replacement.
Whether you’re diagnosing a smoking engine, comparing forged versus cast piston options, or just trying to understand why the same-looking kit fits four different Polaris model lines, you’ll find the specific numbers and specific guidance here.
Understanding the Polaris 800 Twin Engine Platform
The engine behind every “800 piston kit” search is Polaris’s liquid-cooled, four-stroke, twin-cylinder engine — officially displacing 760cc despite being marketed across the lineup as an “800.” This engine debuted in the Sportsman 800 EFI and was carried into the original 2008 Polaris RZR 800, described at launch as sharing its powerplant with the established Sportsman 800 ATV rather than starting from an unproven design. From there, Polaris extended the same core engine architecture into the Ranger 800 utility side-by-side line, creating the three-way parts and fitment overlap that defines this platform to this day.
Because RZR, Ranger, and Sportsman 800 models all draw from the same 760cc twin, a huge share of the aftermarket piston kit market is built around universal fitment across all three vehicle lines — which is genuinely useful for parts availability, but also the single biggest source of buyer confusion when a listing shows a dozen model names and years in its compatibility chart.
Why This Engine Earns Both Praise and Complaints
The Polaris 800 twin has a reputation split roughly down the middle among long-term owners: it’s been called a genuinely strong, capable unit by riders who maintain it properly, while others report piston ring wear, dust ingestion damage, and top-end failures well before what most owners would consider high mileage. Independent troubleshooting resources consistently point to a specific, narrow list of root causes — piston ring wear, valve guide wear, overheating, crankshaft bearing damage, timing chain tensioner issues, oil pressure regulator failures, and dust ingestion — rather than a single catastrophic design flaw. Understanding which of these actually applies to your machine is the first step before you buy any parts, and it’s a distinction that matters more than it might first appear: an engine written off as “unreliable” by one owner may simply have suffered a preventable dust ingestion failure that a different owner, more diligent about air filter maintenance, never experienced at all.
Transverse Mounting and Chassis Integration
In the RZR specifically, this 760cc twin is mounted transversely behind the seats, a packaging decision that helped Polaris fit the drivetrain into the RZR’s compact chassis and became a defining characteristic of the original sport-UTV category the RZR helped create. This mounting position matters practically for piston kit installation, since accessing the top end on an RZR involves a different disassembly sequence than the same engine mounted longitudinally in a Ranger utility platform — a detail worth confirming against your specific service manual before starting a rebuild.
The Even-Firing Twin Design
This engine uses an even-firing, twin-cylinder layout with electronic fuel injection — a configuration Polaris specifically engineered to provide smoother, more evenly spaced power pulses than an uneven-firing twin would deliver. In the original RZR launch, this smoother delivery was noted as a genuine performance advantage over the utility-based side-by-sides that dominated the market at the time, since it translated into more predictable throttle response on technical terrain. That even-firing characteristic remains relevant to piston kit selection today: because both cylinders fire at evenly spaced intervals under identical load and heat conditions, piston wear between the two cylinders tends to progress fairly symmetrically, which is why a full top-end rebuild almost always replaces both pistons together rather than addressing one cylinder in isolation.
EFI’s Role in Engine Longevity
The Bosch electronic fuel injection system on this engine automatically compensates for changes in altitude, temperature, and atmospheric pressure without requiring the carburetor jetting adjustments that older, carbureted ATV and UTV engines demanded. This matters for piston health specifically because consistent, properly compensated fuel delivery helps prevent the lean-running conditions that accelerate piston and ring wear — one more reason why pairing a big bore piston kit with appropriate supporting fuel system tuning (rather than leaving the stock EFI mapping unchanged) matters as much as the mechanical bore increase itself.
Full Engine and Piston Kit Specifications
Below are the core specifications for the Polaris 800 twin engine and the piston kits built to service it.
| Specification | Detail |
|---|---|
| Engine type | Liquid-cooled, 4-stroke, twin-cylinder |
| Actual displacement | 760cc (marketed as “800”) |
| Standard bore diameter | 80.00mm |
| Big bore diameter (common aftermarket option) | 82.00mm (some kits offer 81.5mm) |
| Stroke | 76mm (76.5mm per factory service manual) |
| Piston pin diameter | 18mm |
| Compression ratio (standard bore, stock) | Approximately 10:1 to 11:1 depending on variant |
| Compression ratio (aftermarket forged kits) | Commonly 10.2:1–10.5:1 for pump-gas compatibility |
| Fuel system | Bosch electronic fuel injection (EFI) |
| Oil requirement | Polaris PS-4 Plus synthetic oil (or equivalent) |
| Oil capacity | Approximately 2 quarts / 1.9 liters |
| Coolant capacity | Approximately 4.8 quarts / 4.5 liters |
| Compression pressure spec (stock) | Approximately 150–185 psi depending on variant |
The “760 vs. 800” Naming: A Closer Look
This is one of the most common points of confusion for buyers, and it’s worth addressing directly. Polaris marketed this engine family as “800,” but the factory service manual and most technical documentation list actual displacement at 760cc. A genuine 800cc figure is only reached with an aftermarket big bore kit — which is precisely why enthusiasts sometimes describe an 82mm big bore build as bringing the engine up to “a true 800.” When you see “800” on a part listing, understand that it refers to the model family name, not necessarily the exact displacement of the cylinder you’re ordering. This naming convention isn’t unique to Polaris — many manufacturers across the powersports industry round displacement figures for marketing purposes — but it’s worth internalizing specifically for this platform, since the gap between marketed and actual displacement is large enough (760cc versus 800cc, roughly a 5% difference) to matter when you’re comparing specifications against a competing engine or deciding whether a big bore kit is worth pursuing for its own sake.
Which Models Share This Engine: RZR, Ranger, and Sportsman Fitment
Because this 760cc/800 twin spans three separate Polaris vehicle lines, piston kit fitment charts read more like a family tree than a simple year-and-model lookup. Based on standard aftermarket compatibility listings, the shared-engine family generally includes:
| Vehicle Line | Common Model Years Using This Engine |
|---|---|
| RZR 800 | 2008–2014 |
| RZR S 800 | 2009–2014 |
| RZR 4 800 | 2010–2014 |
| Ranger 800 4×4 | 2010–2014 |
| Ranger 800 4×4 Crew | 2010–2014 |
| Ranger 800 4×4 Midsize | 2013–2014 |
| Ranger 800 6×6 | 2010–2017 |
| Ranger HD 800 | 2010–2012 |
| Ranger XP 800 | 2010–2012 |
| Sportsman 800 EFI | 2005–2010 |
| Sportsman 800 4×4 | 2005–2014 |
| Sportsman 800 6×6 | 2009–2014 |
| Sportsman X2 800 | 2007–2009 |
| Sportsman Forest 800 | 2012–2015 |
| Sportsman Touring 800 | 2008–2009 |
Always verify against your specific VIN and model year. While the core 760cc block is shared broadly across this list, Polaris used different compression ratios, cylinder head configurations, and “H.O.” (High Output) variants across different applications — the factory service manual for a given model year specifies compression ratio and bore/stroke precisely, and that’s the reference to check before ordering, not just the vehicle nameplate alone.
Why the Shared Platform Is Actually Good News for Buyers
The upside of this fitment complexity is real: because so many different Polaris models pull from the same parts pool, piston kits for this engine are widely available from multiple manufacturers — Wiseco, ProX, Namura, Vertex, and others — at competitive pricing, and finding a compatible kit is rarely difficult even for older model years. The complexity is in choosing the right kit for your specific compression and bore needs, not in finding a kit that exists at all. This is worth appreciating in context: owners of less common ATV and UTV platforms often struggle to find any aftermarket support at all for an engine no longer in active production, whereas the sheer volume of vehicles built around this shared 760cc twin means parts availability is likely to remain strong for years to come.
Signs You Need a Piston Kit: Diagnosing Top-End Failure
Before ordering any parts, confirm the top end is actually the problem — a diagnosis that saves you from spending money on a piston kit when the real issue lies elsewhere in the engine.
Loss of Power and Reduced Compression
A gradual loss of power, especially when paired with lower-than-spec compression pressure readings, is one of the clearest signs of piston ring wear. Owners have reported this exact pattern after several thousand miles of use — one documented case describes a loss of power that led directly to a full top-end teardown, where the pistons showed visible wear and an oversized ring end gap consistent with normal wear-driven degradation rather than sudden failure.
Oil Consumption and Smoking
Burning oil at a noticeable rate, sometimes described by owners as needing to top off oil far more frequently than a healthy engine should require, points toward worn piston rings failing to maintain proper cylinder sealing. In documented cases, owners have reported burning oil heavily enough to require a top-end rebuild well before what most would consider high mileage for the platform.
Dust Ingestion Damage
Dust ingestion is repeatedly cited by independent troubleshooting resources as one of the most common causes of premature engine problems on this platform, and it directly damages piston rings and cylinder walls when abrasive particles bypass a poorly sealed air filter. This is a preventable failure mode rather than a design flaw, discussed further in the prevention section below.
Knocking or Unusual Noise
A knocking sound, particularly one that doesn’t change with load, can indicate serious bottom-end damage (rod bearings, crankshaft) rather than a top-end-only issue — a critical distinction, since a piston kit alone won’t resolve a bottom-end problem. If you hear knocking, a full teardown and inspection is warranted before purchasing any parts, since ordering a piston kit for what’s actually a rod bearing failure wastes money and delays the real repair.
Compression Testing Before You Buy Anything
The single most reliable diagnostic step before ordering a piston kit is a compression test on both cylinders. Compare your readings against the factory specification for your specific model year (commonly in the 150–185 psi range depending on variant) — a reading significantly below spec, especially when consistent with visible ring wear on inspection, confirms the top end is the correct place to focus your rebuild budget.
Ruling Out Non-Piston Causes of Similar Symptoms
Before committing to a piston kit purchase, it’s worth briefly ruling out a handful of other issues that can mimic top-end symptoms without actually requiring piston replacement. A clogged or failing fuel injector can cause power loss and rough running that superficially resembles compression loss, but resolves with fuel system service rather than an engine teardown. A failing oil pressure regulator — explicitly listed among this platform’s known problem areas — can cause symptoms that overlap with piston-related oil consumption complaints without the piston or rings actually being at fault. And a simple vacuum or intake boot leak can cause a lean-running condition with symptoms similar to early piston distress. A compression test, combined with a basic fuel system and intake inspection, helps separate a genuine piston kit need from one of these more affordable alternative repairs.
Real Owner Scenarios: Matching This Guide to Your Situation
Scenario 1: “My RZR 800 Has Lost Power and I Suspect the Top End”
Start with a compression test on both cylinders before ordering anything. If readings are meaningfully below the factory specification for your model year, and a basic fuel system and air intake inspection doesn’t reveal an obvious alternative cause, a top-end teardown to inspect the pistons and rings directly is the appropriate next step. Given that this platform’s piston wear tends to progress fairly symmetrically between the two cylinders (a consequence of its even-firing design), plan to replace both pistons together rather than addressing only the cylinder showing the worse reading.
Scenario 2: “I’m Buying a Used RZR, Ranger, or Sportsman 800 and Want to Know What to Check”
Ask directly about maintenance history, particularly oil change frequency and any documented top-end work. Request a compression test as part of your pre-purchase inspection if the seller will allow it, since this single check tells you more about the engine’s remaining life than mileage alone. Inspect the air filter and its seal directly, since dust ingestion damage — this platform’s most commonly cited preventable failure mode — often traces back to exactly this component being neglected or improperly sealed by a previous owner.
Scenario 3: “I Want More Power and Am Considering a Big Bore Kit”
Budget for the complete package, not just the piston kit itself: a reputable, purpose-built big bore cylinder (not a basic bore-and-reline job), supporting fuel system tuning to avoid a lean-running condition, and clutch recalibration to actually take advantage of the new power curve. Attempting a big bore build on an otherwise completely stock machine, hoping to add the parts piecemeal later, is the path most likely to leave you disappointed with a build that runs hot and doesn’t feel meaningfully faster than stock.
Scenario 4: “I’m a First-Time DIY Mechanic Attempting This Rebuild”
A standard bore top-end rebuild, without camshaft replacement, is a genuinely approachable first engine project for a mechanically inclined owner with basic tools and patience — multiple forum accounts describe successful first-time rebuilds using exactly this scope. If your project expands to include camshaft replacement or bottom-end work, invest extra time studying the timing mark alignment procedure specifically, since this is the step most consistently flagged as confusing by other first-time builders, and consider watching a complete video walkthrough rather than relying on the printed manual alone.
Scenario 5: “My Engine Just Seized or I Found a Broken Connecting Rod on Teardown”
This is bottom-end damage, and a piston kit alone won’t resolve it. Get a complete assessment of the damage extent before deciding between a full bottom-end rebuild and a crate engine replacement — as the cautionary account referenced earlier in this guide illustrates, a rebuild that only addresses visible top-end symptoms without a thorough bottom-end inspection can fail again shortly after reassembly. When in doubt, price out both paths (parts-and-labor for a full rebuild versus a crate engine) before committing, since the labor cost of an extensive bottom-end rebuild sometimes tips the economics toward a straightforward engine swap.
Standard Bore vs. Big Bore: Choosing the Right Kit
This is the decision point where most buyers get stuck, and it deserves a direct, honest breakdown.
Standard Bore (80mm)
A standard 80mm bore piston kit restores the engine to factory specifications — same displacement, same compression characteristics, same power output as when the machine left the factory. This is the right choice for most owners doing a straightforward maintenance rebuild: the cylinder isn’t damaged beyond standard bore tolerances, you want predictable, proven reliability, and you’re not chasing additional horsepower. Standard bore kits are also generally the most affordable option and the most widely available across every major piston kit manufacturer serving this platform.
Big Bore (82mm, sometimes 81.5mm)
A big bore kit increases displacement — genuinely bringing the engine closer to an actual 800cc, as enthusiasts note — by boring the cylinder out to 82mm (or an intermediate 81.5mm on some kits) and installing correspondingly larger pistons. This delivers a real, noticeable increase in horsepower and torque, but it’s not a simple bolt-in upgrade: most reputable big bore kits require the cylinder to be bored and relined (some kits operate as a cylinder exchange program, others as a machining service on your existing cylinders), and serious builders caution against running a big bore kit on an otherwise 100% stock setup, since the engine can run lean without supporting changes to the intake and fuel mapping.
The “Just Bored and Relined” Warning
One consideration worth taking seriously before choosing a big bore kit: some cheaper big bore options are simply stock cylinders bored oversized and relined, rather than genuinely new, purpose-built big bore jugs — and owner reports describe these budget kits running hotter than kits built around new, purpose-engineered cylinders. If you’re investing in a big bore build, understand which category your chosen kit falls into before you commit, since the price difference between a basic bore-and-reline kit and a fully engineered big bore cylinder can run several hundred dollars, and that difference often reflects genuine differences in running temperature and long-term durability.
Decision Framework
| Your Situation | Recommended Bore Choice |
|---|---|
| Routine maintenance rebuild, stock power is fine | Standard bore (80mm) |
| Cylinder damage exceeds standard bore tolerance | Standard bore with appropriate oversize, or big bore |
| Want meaningfully more power and plan supporting mods (intake, clutching, exhaust) | Big bore (82mm) with a reputable, purpose-built cylinder |
| Want more power but plan to keep everything else stock | Reconsider — a big bore kit on an otherwise stock setup tends to run lean and hot |
| Budget-constrained, first-time rebuild | Standard bore — lower cost, proven reliability, simpler installation |
Cast vs. Forged Pistons: What Actually Matters
Piston kits for this platform are available with either cast (including hypereutectic) or forged pistons, and the difference matters more for some owners than others.
Cast and Hypereutectic Pistons
OEM-style replacement kits typically use cast or hypereutectic aluminum pistons — a material choice that’s well-suited to stock or near-stock power levels and represents the most cost-effective way to restore an engine to original specifications. Several rebuild kit manufacturers apply additional treatments to these pistons, such as MOS2 (Teflon/Molybdenum) skirt coatings to reduce friction and hard anodizing on the crown to protect against combustion chamber heat and improve ring seal longevity — refinements aimed at improving on baseline OEM durability without the cost premium of forged construction.
Forged Pistons
Forged pistons offer greater strength and are the standard choice for big bore builds, boosted (turbocharged) applications, or any build pushing meaningfully beyond stock power output. Forged big bore kits for this platform commonly ship with a 10.5:1 pump-gas-compatible compression ratio, balancing the strength benefits of forged construction with practical street/trail fuel compatibility.
Which One Do You Actually Need?
For a standard-bore maintenance rebuild returning the engine to stock specifications, cast or hypereutectic pistons are entirely appropriate and are what most reputable rebuild kits include by default. Forged pistons become worth the added cost specifically when you’re building a big bore engine, adding forced induction, or otherwise pushing well past factory power levels — situations where the added strength margin genuinely matters rather than being a marketing upsell.
What a Complete Piston Kit Should Include
Not every listing labeled “piston kit” includes the same components, and understanding what you’re actually buying prevents a frustrating mid-rebuild parts run.
Minimal Piston Kit
A bare-minimum piston kit typically includes just the piston itself, wrist pin, wire locks (circlips), and a set of piston rings — appropriate only if you’re not replacing the cylinder and don’t need gaskets, meaning your existing cylinder, gaskets, and seals are all still in serviceable condition.
Top-End Rebuild Kit
A more complete top-end kit adds the cylinder itself (often Nikasil-coated for wear resistance) along with a full top-end gasket set covering the head gasket, base gasket, and associated seals — the right choice when the cylinder shows wear beyond standard bore tolerance, or when you’d simply rather not risk reusing a gasket that’s already been compressed once.
Complete Engine Rebuild Kit
The most comprehensive option is a full engine rebuild kit, which pairs the top-end components above with bottom-end parts: a complete crankshaft assembly with connecting rod, main bearings and seals, and — critically for this specific platform — counter-balancer bearings. Several rebuild kit suppliers now explicitly call out counter-balancer bearing inclusion as a feature, reflecting how commonly this component gets overlooked in a rebuild that only addresses the top end, only for the owner to face a repeat teardown later when the counter-balancer bearing fails on its own schedule.
A Practical Checklist Before You Order
- Does the kit include the cylinder, or only the piston?
- Does it include a full gasket set, or will you need to source gaskets separately?
- Does it specify standard bore or big bore, and does that match your cylinder’s actual condition?
- Does it include wrist pins and circlips, or are those sold separately?
- If you’re doing a full rebuild, does it include bottom-end components like the crankshaft, main bearings, and counter-balancer bearings?
- Is the cylinder Nikasil-coated, or a bare aluminum bore, and does that match what you’re comparing it against on price?
- Does the listing specify piston ring material and any protective coatings, or leave that detail vague?
Tools and Workshop Setup Needed for a DIY Piston Kit Install
Before starting a piston kit installation, gathering the right tools ahead of time prevents a mid-rebuild parts-store run with the engine sitting disassembled on a bench.
Essential Tools
- A complete metric socket and wrench set, since virtually every fastener on this engine uses metric hardware.
- A torque wrench capable of both low and high torque ranges, since cylinder head bolts, case bolts, and smaller fasteners like camshaft components each have distinct torque specifications that matter for a reliable rebuild.
- A piston ring compressor sized appropriately for the 80mm (or 82mm, for big bore builds) bore diameter, which is essential for safely guiding new rings into the cylinder without breaking them during reassembly.
- A compression tester, both for pre-rebuild diagnosis and for confirming proper ring seating after the job is complete.
- A service manual specific to your exact model and year, since disassembly sequences, torque specs, and timing procedures vary enough between RZR, Ranger, and Sportsman variants that a generic guide isn’t a substitute for the factory documentation.
Optional but Valuable Additions
- A dial bore gauge or telescoping gauge with micrometer, for measuring actual cylinder wear and confirming whether your cylinder is within standard bore tolerance or needs to go oversize.
- A controlled heat source (a heat gun, used carefully) for easing wrist pin removal without forcing it, which reduces the risk of damaging the connecting rod’s small-end bore.
- A clean, dedicated workspace with adequate lighting, since engine internals are unforgiving of dirt or debris contamination introduced during reassembly — a genuinely common cause of premature wear on an otherwise correctly installed fresh piston kit.
When to Call a Professional Instead
If your rebuild scope has expanded to include bottom-end work — crankshaft replacement, connecting rod service, or counter-balancer bearing replacement — and you don’t have prior experience with this specific engine’s timing gear alignment procedure, professional installation is a reasonable choice rather than a concession. Several forum discussions referenced throughout this guide describe DIY builders getting stuck specifically at the piston-to-top-dead-center timing mark alignment step, which is exactly the kind of procedure where a mistake is both easy to make and expensive to diagnose after the fact.
How a Piston Kit Interacts With Clutching and Drivetrain Tuning
A piston kit doesn’t exist in isolation from the rest of the drivetrain, and understanding this interaction matters most for big bore builds but is worth knowing even for a standard bore maintenance rebuild.
Standard Bore Rebuilds and Clutching
A standard bore piston kit that restores the engine to factory specifications typically requires no clutch or drivetrain changes, since power output returns to the same baseline the CVT and clutch weights were originally calibrated around. This is one of the practical advantages of choosing standard bore for a routine maintenance rebuild — you’re not opening up a secondary set of tuning decisions beyond the engine itself.
Big Bore Builds and Clutch Recalibration
A big bore kit meaningfully changes the engine’s power curve, and running the stock clutch calibration afterward often results in the engine not reaching its optimal RPM band under load — leaving real performance on the table even after a successful mechanical installation. Builders investing in a big bore kit typically pair it with clutch weight and spring changes calibrated to the new power curve, which is part of why serious big bore builds are usually planned as a package (bore kit, supporting fuel tuning, clutch recalibration) rather than a single isolated part swap.
Why This Matters for Budgeting
If you’re planning a big bore rebuild, budgeting only for the piston kit itself and not the supporting clutch and tuning work often leads to disappointment — a mechanically correct big bore install that doesn’t feel meaningfully faster than stock, simply because the drivetrain wasn’t recalibrated to take advantage of the engine’s new power delivery. Factoring these supporting costs into your project budget from the outset avoids this common letdown.
Step-by-Step Piston Kit Installation Overview
This overview covers the general sequence for a top-end piston kit installation on this platform. Always follow your specific model year’s factory service manual for exact torque specifications, timing procedures, and disassembly sequences, since RZR, Ranger, and Sportsman variants differ in accessory and bodywork disassembly even though the core engine procedure is similar.
- Drain fluids and remove bodywork/accessories as needed to access the engine per your model’s specific service manual.
- Remove the exhaust and intake components connected to the cylinder head.
- Remove the cylinder head, following the factory-specified bolt loosening sequence to avoid warping.
- Remove the cylinder from the crankcase, taking care to support the connecting rod as the cylinder comes free.
- Remove the old piston by extracting the wire locks (circlips) and pressing out the wrist pin — many mechanics use a controlled heat source on the piston to ease pin removal without forcing it.
- Inspect the connecting rod and wrist pin bore for wear or damage before proceeding, since a worn rod small-end bore compromises even a brand-new piston installation.
- Install the new piston onto the connecting rod, using new wrist pins and wire locks (never reuse old circlips) — orient the piston correctly per the arrow or marking on the crown, which typically indicates the direction facing the exhaust or intake side.
- Install new piston rings, staggering the ring end gaps per the kit’s instructions rather than aligning them, which helps maintain proper cylinder sealing.
- Lubricate the piston, rings, and cylinder bore with clean engine oil or assembly lube before reinstalling the cylinder.
- Reinstall the cylinder, using a ring compressor tool to carefully guide the rings into the bore without breaking them.
- Reinstall the cylinder head with a new head gasket, torquing head bolts to the factory specification in the correct sequence and stages.
- Reinstall the camshaft, lifters, and valve train components if they were disturbed, being especially careful to set valve timing correctly using the timing marks specified in your service manual — this is a step several forum discussions flag as the most error-prone part of a DIY rebuild.
- Reinstall intake and exhaust components, refill fluids, and perform a thorough visual inspection before starting the engine.
- Perform an initial start and leak check, watching closely for oil leaks, coolant leaks, or unusual noise before taking the machine for a test ride.
Timing Marks Deserve Special Attention
Multiple owner accounts specifically flag piston-to-top-dead-center timing mark alignment as the most confusing step in a DIY rebuild, particularly when replacing the camshaft alongside the piston kit. If your rebuild includes camshaft work, watching a complete, model-specific video walkthrough before starting — rather than relying on the printed manual alone — is genuinely useful preparation, since visualizing the gear alignment sequence in motion clarifies a step that’s difficult to fully understand from static diagrams.
Break-In Procedure After a Piston Kit Install
A freshly installed piston kit requires a proper break-in period to seat the rings correctly against the cylinder wall — skipping or rushing this step is one of the most common causes of disappointing performance or premature wear on an otherwise correctly installed rebuild.
- Avoid sustained high-RPM operation for the break-in period specified by your kit manufacturer or service manual, since consistent load variation (rather than constant RPM) helps rings seat properly against the cylinder wall.
- Change the oil and filter after the break-in period, since the initial break-in generates metal particulate from ring seating that you don’t want circulating in the engine long-term.
- Monitor closely for leaks, unusual noise, or overheating during the first several rides, since a rebuild issue — a misaligned ring gap, an improperly torqued head bolt — is far more likely to surface during this initial period than after extended trouble-free use.
- Recheck head bolt torque after the specified break-in interval on some engines, since gasket compression can change slightly after the first heat cycles — confirm whether your specific service manual calls for this step.
Common Mistakes That Ruin a Fresh Piston Kit
Several recurring mistakes show up across owner rebuild accounts for this platform, and avoiding them is often the difference between a rebuild that lasts and one that requires a repeat teardown within a season.
Reusing Old Circlips or Wrist Pins
Reusing a piston’s wire locks or wrist pin instead of installing the new components included in the kit is a common shortcut that risks a circlip failure — a genuinely catastrophic failure mode, since a departed wrist pin can destroy the cylinder wall and connecting rod on its way out.
Not Replacing the Cam Chain Tensioner During a Top-End Job
Independent troubleshooting resources list timing chain tensioner issues among the platform’s known problem areas. If you’re already inside the top end for a piston replacement, inspecting — and often replacing — the cam chain tensioner while everything is disassembled avoids a second teardown down the road for a relatively inexpensive part.
Skipping the Air Filter Seal Check
Since dust ingestion is one of the most commonly cited causes of piston and ring damage on this platform, reinstalling the air intake system after a rebuild without carefully verifying the air filter seal is intact effectively invites a repeat failure — undoing the entire rebuild’s value over the following riding season.
Underestimating the Bottom End
Owners who focus exclusively on the top end sometimes discover, after reassembly, that a bottom-end issue — worn rod bearings, a damaged counter-balancer bearing — was the actual root cause of their original symptoms, requiring the engine to be opened back up. If your symptoms included any knocking noise or the engine had run low on oil at any point in its history, a bottom-end inspection alongside the piston kit installation is worth the extra time, even if it wasn’t originally part of your plan.
Rushing the Timing Mark Alignment
As noted in the installation section above, incorrect valve timing during reassembly is one of the most frequently cited points of confusion in DIY rebuild accounts for this platform. Taking the time to fully understand — not just follow — the timing procedure before starting reassembly prevents a mistake that can be expensive and time-consuming to diagnose after the fact.
Mismatching Piston Kit Compression to Fuel Availability
Installing a high-compression piston kit without considering local fuel availability is a mistake that surfaces gradually rather than immediately — a compression ratio that requires premium fuel, run consistently on lower-octane gas, can lead to detonation-related damage over time even when every other aspect of the installation was performed correctly. Before selecting a piston kit based on compression ratio alone, confirm what fuel octane it’s designed around and whether that’s realistically available wherever you typically fuel up, particularly for remote trail riding where fuel options can be limited.
Neglecting to Re-Torque After Initial Heat Cycles
Some engines, including certain configurations of this platform, benefit from a head bolt re-torque check after the initial break-in heat cycles, since gasket material can compress slightly once it’s been through several full heat-and-cool cycles. Skipping this step isn’t always catastrophic, but it’s a small, low-cost precaution that owner accounts describe catching a marginally under-torqued bolt before it became a head gasket leak — cheap insurance for a rebuild you’ve already invested significant time and money into.
Rebuild vs. Replace: When a New Engine Makes More Sense
Not every top-end problem justifies a fresh piston kit and rebuild — sometimes the more cost-effective path is a full engine replacement, and it’s worth understanding when that calculus shifts.
When a Piston Kit Rebuild Makes Sense
If the issue is isolated to the top end — piston ring wear, a damaged piston from dust ingestion, or a cylinder that needs to be bored oversized — and the bottom end (crankshaft, connecting rod, main bearings) checks out during inspection, a piston kit and top-end rebuild is almost always the more economical choice, particularly for an owner comfortable doing the labor themselves.
When a Full Engine Replacement Makes More Sense
If the damage extends to the bottom end — a broken connecting rod, spun rod bearings, or a cracked case — the calculus changes considerably. Owners who’ve faced this exact situation report that a complete crate engine, while a larger upfront cost, can end up being more cost-effective and less risky than piecing together an extensive rebuild, particularly when factoring in the value of a technician’s labor time on a complex bottom-end repair versus a straightforward crate engine swap.
A Real-World Cautionary Tale
One documented account describes an owner whose engine was rebuilt by a shop — top end and rings — only to suffer a broken case and connecting rod shortly after, raising the uncomfortable question of whether the failure stemmed from poor workmanship or bad luck. This is a useful reminder that a piston kit rebuild is only as good as the surrounding diagnostic work and installation quality; a rushed or incomplete inspection before reassembly can mask a bottom-end problem that resurfaces almost immediately after the top end is refreshed. It’s also a reminder that professional installation, while generally lower-risk than a first-time DIY attempt, isn’t a guarantee against every possible outcome — choosing a shop with a specific, verifiable track record on this exact engine platform, rather than a generalist powersports shop, meaningfully improves your odds of a rebuild that actually lasts.
Cost Breakdown: Piston Kit vs. Full Top-End vs. Crate Engine
| Repair Scope | Typical Cost Range | Best For |
|---|---|---|
| Piston-only kit (piston, rings, pin, circlips) | Lowest cost option | Cylinder in good condition, isolated piston/ring wear |
| Top-end rebuild kit (piston, cylinder, gaskets) | Mid-range, commonly several hundred dollars | Cylinder wear beyond tolerance, or peace of mind with fresh gaskets |
| Big bore kit (cylinder boring/relining, forged pistons) | Higher cost, with meaningful price spread between basic and premium kits | Owners seeking a genuine power increase alongside the rebuild |
| Complete engine rebuild kit (top end + bottom end) | Higher cost than top-end-only, but far less than a crate engine | Bottom-end wear alongside top-end issues, high-mileage engines |
| Crate/replacement engine (dealer or aftermarket) | Highest cost, commonly several thousand dollars | Severe bottom-end damage, cracked cases, or when labor economics favor a swap over piecing together parts |
The most important cost-related takeaway from real owner rebuild threads: a proper diagnosis before ordering parts prevents the single most expensive mistake in this category — buying a piston kit for what turns out to be a bottom-end failure, then having to order additional parts (or pivot to a crate engine) after the fact. A compression test, a careful teardown inspection, and an honest look at the counter-balancer bearing and connecting rod condition before finalizing your parts order pays for itself many times over.
Labor Time Expectations
For an owner comfortable with basic mechanical work and following a factory service manual, a standard top-end piston kit installation (piston, rings, cylinder, gaskets, no camshaft work) typically spans a full weekend for a first-time attempt, factoring in careful inspection, cleaning, and the extra time a first rebuild naturally takes compared to a repeat job. Adding camshaft replacement or bottom-end work extends this considerably, both because of the additional disassembly and reassembly involved and because of the extra care warranted around timing mark alignment. A professional shop, working from familiarity with this specific engine, typically completes a standard top-end job considerably faster — which is reflected in labor cost estimates when you’re comparing DIY parts-only pricing against a shop’s all-in quote.
DIY vs. Professional Installation: A Practical Comparison
| Factor | DIY Installation | Professional Shop Installation |
|---|---|---|
| Upfront cost | Parts only | Parts plus labor |
| Time investment | A full weekend or more for a first attempt | Typically faster, reflecting technician familiarity |
| Risk of mistakes | Higher for first-time builders, particularly around timing marks | Lower, assuming a shop experienced with this specific platform |
| Diagnostic depth | Dependent on the owner’s own inspection thoroughness | Often includes a more complete bottom-end assessment as standard practice |
| Warranty on the work itself | None, unless self-certified | Commonly backed by shop labor warranty |
| Best suited for | Mechanically confident owners with time and the right tools | Owners prioritizing speed, certainty, or lacking a suitable workspace |
Neither path is objectively correct — the right choice depends on your comfort level, available time, and how much you value the learning experience of doing the work yourself versus the certainty of professional installation. Many long-term owners of this platform report handling routine top-end work themselves while reserving bottom-end or big bore builds for a trusted shop, a reasonable middle-ground approach given how the complexity and risk profile shifts between these two scopes of work.
Preventing Premature Piston Failure Going Forward
Once you’ve installed a fresh piston kit, a handful of ongoing habits meaningfully extend how long it lasts before you’re back here again.
Air Filter Maintenance Is Non-Negotiable
Given how consistently dust ingestion appears as a root cause of piston and ring damage on this platform, treating air filter inspection and sealing as a near-obsessive habit — checking it before every dusty ride, not just on a calendar schedule — is the single highest-leverage thing an owner can do to protect a fresh piston kit investment. Some owners specifically upgrade their air intake routing, adding a foam pre-filter positioned to draw combustion air through a more protected path, as a direct response to this failure pattern.
Oil Change Discipline
Regular oil changes, using the specified PS-4 Plus synthetic oil or an appropriate equivalent, protect not just the piston and rings but the entire engine’s wear-sensitive components. Owners who report the longest trouble-free mileage on this platform consistently describe aggressive oil change intervals — some tightening well below the factory-recommended severe-use interval — as central to that longevity.
Address Small Issues Before They Compound
Independent repair resources note that many of this platform’s most common problems — piston ring wear, valve guide wear, overheating, timing chain tensioner issues — develop gradually rather than appearing suddenly. Addressing a small performance change (slightly reduced power, a minor increase in oil consumption) promptly, rather than continuing to ride and hope it resolves on its own, catches problems while they’re still isolated to the top end rather than allowing them to progress into bottom-end damage.
Avoid Overheating Events
Overheating is directly linked to piston and ring damage on this platform, making cooling system maintenance — clean radiator, correct coolant level, functioning fan — an indirect but genuinely important part of protecting your piston kit investment, even though it’s not a piston-specific maintenance task on its own.
Building These Habits Into a Routine
None of these prevention steps require significant expense or specialized skill — they require consistency. Owners who report the longest intervals between top-end rebuilds on this platform tend to describe the same underlying pattern: air filter checks before dusty rides, oil changes on a tight interval, and prompt attention to small performance changes rather than waiting for a symptom to become undeniable. Building these into a genuine routine, rather than treating them as occasional tasks, is what separates an owner who rebuilds their top end once every 15,000–20,000 miles from one facing a repeat teardown every few thousand.
Buying Guide: What to Look For in a Piston Kit Listing
Confirm Exact Fitment
Cross-reference the listing’s compatibility chart against your specific model, year, and — where available — engine model number, not just the general “800” nameplate. Given how many different vehicles share this engine family, and how compression ratios and H.O. variants differ across applications, this single check prevents the most common piston kit ordering mistake.
Confirm Bore Size Explicitly
Listings should clearly state whether you’re buying a standard 80mm bore kit or a big bore option (81.5mm or 82mm) — don’t assume based on price alone, since some standard bore kits from premium brands cost more than basic big bore kits from budget suppliers.
Check What’s Included, Not Just the Photo
As covered in the “what’s included” section above, listings vary widely in scope — piston-only versus full top-end versus complete engine rebuild kit. Read the itemized parts list carefully rather than assuming based on the product photo, which may show more (or fewer) components than what actually ships.
Consider the Brand’s Track Record on This Specific Platform
Established piston and rebuild kit manufacturers serving this platform — including Wiseco, ProX, Namura, and Vertex — have each built a specific reputation among long-term owners, generally around quality consistency, ring material choice, and coating treatments like MOS2 skirt coatings or hard anodizing. Reading recent, platform-specific reviews rather than generic star ratings gives a more accurate picture of how a given kit performs on this exact engine rather than across a manufacturer’s broader catalog.
A Closer Look at Nikasil Cylinder Coating
Many top-end rebuild kits for this platform include a Nikasil-coated cylinder rather than a bare aluminum bore, and understanding why matters when comparing listings. Nikasil is a nickel-silicon carbide composite plating applied to the cylinder’s aluminum bore, offering considerably better wear resistance, heat dissipation, and friction reduction than an untreated aluminum surface would provide on its own. For a twin-cylinder engine running EFI-controlled combustion temperatures and expected to see thousands of miles of service between rebuilds, this coating is not a cosmetic upsell — it’s a meaningful contributor to how long the fresh cylinder and its new piston will actually last before wearing back out of tolerance. When comparing two similarly priced top-end kits, confirming whether the included cylinder is Nikasil-coated or bare aluminum is a legitimate point of differentiation worth factoring into your decision.
Comparing Kit Manufacturers at a Glance
| Manufacturer | Common Piston Material | Notable Features | Best Suited For |
|---|---|---|---|
| Wiseco | Forged | High-strength forged construction, popular for both standard and big bore builds | Performance-focused rebuilds, big bore projects |
| ProX | Cast/hypereutectic | MOS2 skirt coating, hard-anodized crown, validated via dyno testing alongside crankshaft components | Comprehensive rebuild kits restoring factory specs |
| Namura | Cast, hypereutectic | MOS2 (Teflon/Molybdenum) coated skirts, anodized domes, hypereutectic casting | Budget-conscious full rebuild kits |
| Vertex | Forged | Big bore forged kits with OEM-replacement fitment | Big bore builds seeking forged strength at a moderate price point |
This comparison is necessarily general, since specific part numbers and included components vary by application and model year — but it reflects the broad positioning each manufacturer has built within the aftermarket piston kit space for this specific engine platform, based on how their kits are consistently described and marketed across major retailers serving this segment.
Factor In Whether You Need a Core Exchange
Some big bore kits operate on a core exchange basis — you send in your stock cylinder and receive a bored, relined replacement — while others sell the bored cylinder outright for an additional cost. Understand which model you’re buying into before ordering, since a core exchange kit requires you to have your stock cylinder available and in serviceable condition to send in, which affects your rebuild timeline.
Warranty, Recalls, and Documentation Considerations
If Your Machine Is Still Under Factory Warranty
Installing an aftermarket piston kit on a machine still covered by Polaris’s factory warranty is a decision worth making with full awareness of the trade-offs. Aftermarket engine modifications, including piston kit installations performed outside an authorized dealer, can affect warranty coverage on the engine and potentially related components — always review your specific warranty terms, and consider having covered repairs performed through an authorized dealer if warranty status matters to your decision. Once a machine is out of warranty, this consideration naturally falls away, and DIY or independent-shop piston kit work becomes a straightforward cost and quality decision rather than a warranty risk calculation. Given that most machines built around this engine platform are now well beyond their original factory coverage window, this is a consideration that applies to a shrinking share of owners each year — but it’s still worth a quick check against your specific purchase date before proceeding.
Documenting Your Rebuild
Whether or not warranty coverage is a factor, keeping detailed records of your piston kit installation — the specific parts used, torque specifications applied, break-in procedure followed, and any inspection findings from the teardown — serves two practical purposes. First, it gives you (or a future mechanic) a clear reference point if a problem develops down the line, making diagnosis faster and more accurate than starting from scratch. Second, it meaningfully supports resale value if you sell the machine later, since a documented, professionally-executed rebuild is a genuine selling point that a buyer following a guide like this one will specifically look for and value.
Checking for Applicable Recalls
Before undertaking a piston kit rebuild, it’s worth checking your VIN against the National Highway Traffic Safety Administration’s recall database to confirm whether any manufacturer safety recalls apply to your specific unit — a quick, free check that occasionally surfaces an issue unrelated to your piston concern but still worth addressing while the machine is already apart for service.
Altitude, Climate, and Riding Condition Considerations
Because this engine’s Bosch EFI system automatically compensates for changes in altitude, temperature, and atmospheric pressure, riders moving between elevations don’t need to worry about the carburetor rejetting that older, carbureted machines would require. That said, a few environmental factors are still worth understanding in the context of piston health and rebuild planning.
High-Altitude Operation
At significant elevation, reduced air density affects any naturally aspirated engine’s effective power output, a normal characteristic rather than a fault. For piston kit selection specifically, this matters most for big bore builds: an engine tuned and clutched for sea-level power delivery may behave differently at altitude, which is one more reason serious big bore builds benefit from supporting fuel and clutch tuning rather than relying entirely on the stock EFI mapping’s altitude compensation to handle every variable on its own.
Hot-Climate and Sustained-Load Riding
Riders operating primarily in hot climates, or using their RZR or Ranger 800 for sustained towing and work duty, place additional thermal stress on the top end — precisely the kind of stress that accelerates piston and ring wear over time. This is part of why overheating appears repeatedly throughout this guide as a contributing factor to premature piston failure, and why cooling system maintenance (clean radiator, correct coolant level, functioning fan) deserves attention as an indirect but genuinely important part of protecting any piston kit investment, whether freshly installed or years into service.
Dusty and Sandy Environments
As emphasized throughout this guide, dust and sand ingestion is one of the most consistently cited causes of piston and cylinder wear on this platform. Riders in desert, sandy, or extremely dusty environments should treat air filter inspection as a near-obsessive habit rather than a periodic one, and should strongly consider the kind of upgraded pre-filter routing some owners have adopted specifically in response to this failure pattern. A fresh piston kit installed into an engine with a compromised air intake seal will wear out just as fast as the original components did — the piston kit itself was never the weak link in that scenario.
Water Crossings and Moisture Exposure
While less directly tied to piston wear than dust ingestion, water crossings and moisture exposure deserve mention for owners planning a rebuild, since any recent submersion event is worth factoring into your inspection — checking for water contamination in the oil, and confirming the air intake wasn’t compromised during the crossing, before assuming a separate cause for any performance symptoms you’re investigating.
Frequently Asked Questions
How many miles does a Polaris RZR 800 engine last? Reported mileage before major top-end work varies widely across owners, from several thousand miles for machines that see hard use or dust exposure, up to 20,000+ miles for well-maintained examples with disciplined oil changes and air filter care. A properly installed 800 piston kit combined with consistent maintenance is the biggest factor separating owners who see a long engine life from those facing repeat top-end rebuilds.
What size is the piston in a Polaris RZR 800? The Polaris 800 twin uses an 80.00mm standard bore piston with an 18mm wrist pin diameter, paired with a 76mm (76.5mm per factory spec) stroke for an actual displacement of 760cc despite the “800” model name. Aftermarket big bore piston kits commonly increase this to 82.00mm, genuinely bringing the engine closer to a true 800cc displacement.
Is it worth rebuilding a RZR 800 engine, or should I replace it? Rebuilding with a piston kit makes sense when damage is isolated to the top end and the bottom end (crankshaft, connecting rod, bearings) checks out on inspection — this is typically the more economical path. If bottom-end damage is present, such as a broken connecting rod or cracked case, a full crate engine replacement often proves more cost-effective than piecing together an extensive rebuild once labor and parts are factored in.
What causes piston damage in a Polaris RZR 800 engine? Piston ring wear from normal use, dust ingestion through a poorly sealed air filter, and overheating are the most commonly cited causes of piston and cylinder damage on this platform. Dust ingestion in particular is repeatedly flagged by independent troubleshooting resources as a preventable failure mode, making air filter maintenance one of the highest-value habits for protecting a fresh piston kit investment.
Should I get a standard bore or big bore piston kit for my RZR or Ranger 800? Choose a standard 80mm bore kit for a routine maintenance rebuild that restores factory specifications with proven reliability at the lowest cost. Choose an 82mm big bore kit if you want a genuine power increase and plan supporting modifications like intake and clutching changes — running a big bore kit on an otherwise fully stock setup risks a lean-running condition that can generate excess heat.
What’s included in a complete Polaris 800 piston kit? A minimal piston kit includes the piston, wrist pin, circlips, and rings. A top-end rebuild kit adds the cylinder and a full gasket set. A complete engine rebuild kit further adds bottom-end components like the crankshaft assembly, main bearings, and counter-balancer bearings — always check the itemized parts list before ordering, since “kit” scope varies significantly between listings.
Does a RZR 800 piston kit fit a Ranger 800 or Sportsman 800? Yes, in most cases — the RZR 800, Ranger 800, and Sportsman 800 share the same core 760cc twin engine platform, and the majority of aftermarket piston kits are built and marketed for universal fitment across all three vehicle lines. Always confirm the exact model year and, where possible, engine model number against the listing’s compatibility chart, since compression ratio and H.O. variants differ across specific applications.
How much does a Polaris 800 top-end rebuild cost? A standard bore top-end rebuild kit (piston, cylinder, gaskets) typically falls in the mid-range cost tier compared to piston-only kits at the low end and big bore or full bottom-end rebuild kits at the high end. Total cost depends heavily on whether you’re paying for parts only as a DIY project or including professional shop labor, with a complete crate engine representing the most expensive option for machines with severe bottom-end damage.
Final Verdict: Choosing the Right 800 Piston Kit for Your Rebuild
The Polaris 760cc/800 twin engine underpinning the RZR 800, Ranger 800, and Sportsman 800 has proven itself a genuinely capable, rebuildable platform — but one where the piston kit you choose, and the diagnostic care you put in before ordering it, determines whether your rebuild is a lasting fix or a temporary patch. For most owners facing top-end wear from normal use, a standard 80mm bore kit from an established manufacturer restores the engine to reliable factory performance at a reasonable cost. For owners chasing more power and willing to invest in supporting modifications, a reputable 82mm big bore kit — built around genuinely engineered cylinders rather than a basic bore-and-reline job — delivers a real, meaningful upgrade.
Whichever path you choose, the fundamentals matter more than the brand name on the box: confirm your diagnosis with a compression test before ordering, inspect the bottom end honestly rather than assuming the top end is the whole story, buy a kit that matches your actual bore and compression needs, and commit to the air filter and oil change discipline that keeps a fresh rebuild from becoming a repeat job. Do that, and this engine platform has consistently rewarded owners with years of reliable service — the same platform that some riders have pushed past 20,000 miles with nothing more than routine, disciplined maintenance behind it.
The Bigger Picture on This Engine Platform
It’s worth stepping back and putting the piston kit decision in context. This 760cc twin, shared across the RZR, Ranger, and Sportsman 800 lines, has now been in service long enough — spanning production years from the mid-2000s through the mid-2010s — that its failure patterns are extremely well documented, its aftermarket support is mature, and the knowledge needed to rebuild it correctly is widely available rather than locked behind a dealer-only service network. That maturity is genuinely good news for anyone facing a top-end rebuild today: you’re not guessing at an unknown platform’s quirks, you’re working from a well-established body of real-world experience that this guide has drawn together into a single reference.
A Final Word on Doing the Diagnostic Work First
If there’s one theme worth carrying away from this entire guide, it’s that the piston kit itself is rarely where a rebuild goes wrong — the diagnostic work that precedes it is. Buyers who skip the compression test, skip the honest bottom-end inspection, or assume a listing’s compatibility chart applies to their exact model year without double-checking against their service manual are the ones who end up ordering twice, or discovering a deeper problem mid-rebuild that a more careful initial assessment would have caught. Take the extra hour for proper diagnosis before you place an order, and the piston kit installation itself — whether you’re doing it yourself over a weekend or handing it to a trusted shop — becomes a straightforward, well-understood job rather than a gamble.
